Machine applique with embroidery machine is one of my favorite embroidery techniques.
It lets me combine fabric and stitches in a clean, controlled way—and it’s perfect when I want a bold look without thousands of fill stitches.
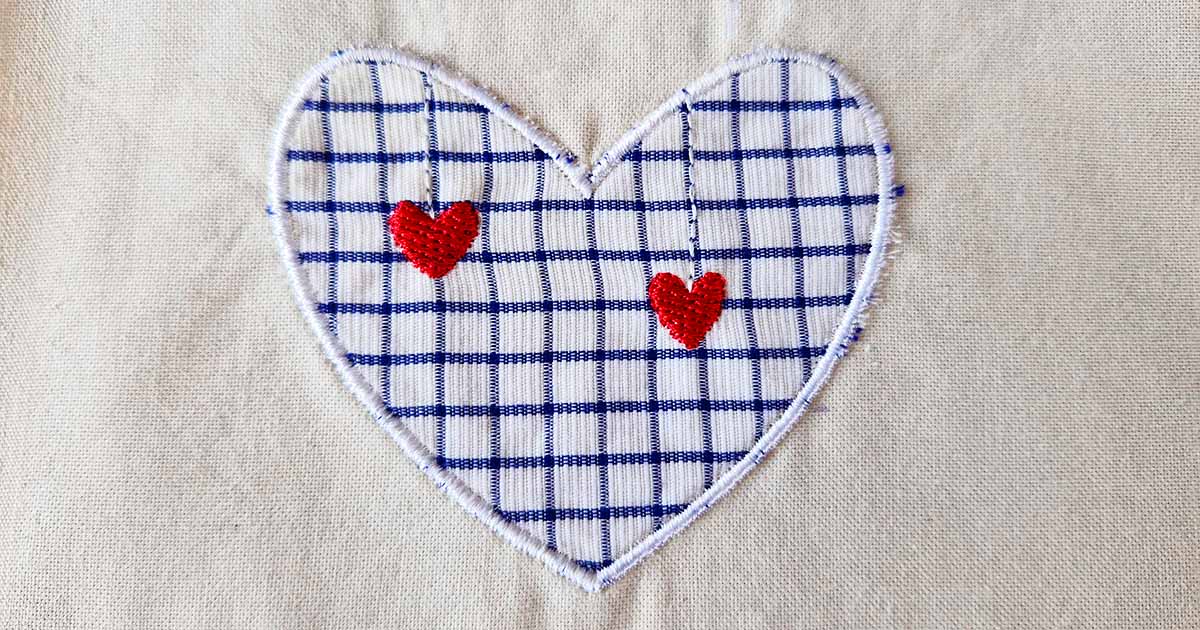
In this step-by-step tutorial, I show exactly how I stitch a heart appliqué and then add two small embroidered hearts on top.
For the appliqué fabric, I’m using a piece from an old checkered shirt (a small upcycling detail that works amazingly well for appliqué).
Machine applique with embroidery machine – materials I use
Here’s what I use for this machine applique with embroidery machine project:
- Embroidery machine + hoop
- Appliqué embroidery design
- Woven cotton scrap (old shirt fabric)
- Tear-away embroidery stabilizer (I hoop this first)
- Temporary spray adhesive
- Fabric scissors + appliqué scissors
- Embroidery thread (outline + detail color)
If you want a simple starting point, this category helps:
machine embroidery basics.
For appliqué specifically, woven fabric is my favorite because it trims cleanly and stays stable.

Step 1: Cut a small piece from an old shirt
I don’t need much fabric for a heart appliqué.
I usually cut off a shirt sleeve first, because it gives me a nice flat section of fabric without seams or bulky layers.
Tip: Prewashed shirt fabric is perfect for machine applique with embroidery machine because it won’t shrink later.

Step 2: Hoop stabilizer and stitch the placement outline
For this project, I hoop the tear-away stabilizer first and then place my base fabric on top (depending on your fabric, you can also hoop fabric + stabilizer together).
Then I start the design.
The first thing my machine stitches is the placement outline of the heart using a bean stitch.
This outline marks the exact position—so I know precisely where the appliqué fabric needs to go.

Step 3: Add spray adhesive and position the appliqué fabric
Now I remove the hoop from the machine—but I keep everything hooped.
This is important for machine applique with embroidery machine, because the alignment depends on the hoop never shifting.
I spray a light layer of temporary adhesive onto the fabric in the hoop (right over the stitched placement line).
Then I place my shirt fabric on top so the entire heart outline is fully covered.
Then I place it over the heart outline so the entire shape is covered.

I always use just enough adhesive to hold the fabric flat—too much can leave residue on the needle.
Step 4: Stitch the tack-down line (this secures the fabric)
I put the hoop back into the machine and continue the design.
The heart outline stitches again—this is the tack-down stitch.

After this step, the fabric is firmly attached and ready to trim.
Step 5: Trim the appliqué fabric (without unhooping)
I remove the hoop again and trim the fabric with appliqué scissors.
I keep everything hooped so the placement stays perfect.

I trim as close as possible to the tack-down line without cutting into the stitches.
If you want an ultra-clean look, this is the step to take your time on.

After trimming, the heart shape already looks neat—now it’s ready for the edge finish.
Step 6: Finish the edge stitch and add the embroidery details
At this point, I place the hoop back into the machine and let the design finish.
For this heart, I used a very open E-stitch around the edge.
You can also use a satin stitch if the design is digitized for it—but an open stitch keeps the appliqué softer and more “fabric-like.

At the end, my machine stitches two small red hearts on top.
That final detail makes the whole appliqué look intentional and complete.

My best tips for machine applique with embroidery machine
A few extra tips that help me get clean results:
- Stabilizer matters: If the base fabric is stretchy, I use a stronger stabilizer or add a second layer.
- Use sharp scissors: Dull scissors fray fabric edges and make trimming harder.
- Test your edge stitch: Open stitches look softer; satin stitches look bold and “patch-like.”
- Keep the hoop stable: For machine applique with embroidery machine, alignment is everything.
More designs you can stitch next:
software & designs.
If you want a quick definition of the general technique, this overview is helpful:
appliqué technique.
FAQ – Machine applique with embroidery machine
What is machine applique with embroidery machine?
Machine applique with embroidery machine is a technique where the machine stitches a placement outline, then a tack-down stitch to secure fabric, and finally an edge finish stitch to cover the raw fabric edge.
Can beginners do machine applique with embroidery machine?
Yes. Machine applique with embroidery machine is one of the most beginner-friendly embroidery techniques because the design guides you through each step.
What fabric works best for machine applique with embroidery machine?
Woven cotton is the easiest choice. Old shirt fabric works especially well because it is stable, prewashed, and trims cleanly.
Do I need spray adhesive for machine applique with embroidery machine?
Spray adhesive is not required, but it makes placement much easier and helps prevent shifting. I always use a light layer to avoid residue.


Leave A Comment